If you aren’t keen on changing the default browser on Windows, this guide will walk you through some useful tips for dealing with slow download speeds in Microsoft Edge. So, let’s take a look.
1. Close Unwanted Tabs
To start, check all the open tabs in Edge and close the ones you don’t need. You can also use Edge’s built-in Browser Task Manager to identify tabs that consume the most network resources. In Microsoft Edge, press Shift + Esc shortcut to launch the Browser Task Manager. Click on the Network column to sort the processes based on their network usage. Select the tabs you aren’t using and click the End process button in the bottom-right corner to close them.
2. Close Unwanted Apps and Programs
You also need to check if other apps or programs on your PC consume too much bandwidth. Apps that stream media or sync data with the cloud may affect download speeds in Edge. You can use the Resource Monitor app on Windows to identify such apps and programs easily. Here’s how: Step 1: Press the Windows key + S to open the search menu, type in resource monitor, and select the first result that appears.
Step 2: Switch to the Network tab. Under ‘Processes with Network Activtiy,’ identify network-intensive apps.
Step 3: Right-click on the app you don’t need and select End Process to close it.
3. Enable Parallel Downloading
Parallel downloading is an experimental feature in Edge that can help accelerate download speeds. When enabled, Edge splits large files into smaller parts and downloads those parts simultaneously. This can help boost download speeds in Edge. To enable Parallel downloading in Edge, type edge://flags/ in the address bar at the top and press Enter. Then, type Parallel downloading in the search box. When the Parallel download flag shows up and use the drop-down menu to select Enabled.
4. Disable Metered Connection
You can limit your PC’s data usage by setting your connection as metered on Windows. However, this may prevent Edge and other apps on your PC from freely using your internet, resulting in slower download speeds. Hence, it’s best to disable this option. Step 1: Press the Windows key + I to launch the Settings app. Navigate to Network & internet tab and click on Wi-Fi.
Step 2: Click on your Wi-Fi network to open its properties.
Step 3: Turn off the Metered connection option.
5. Flush DNS Cache
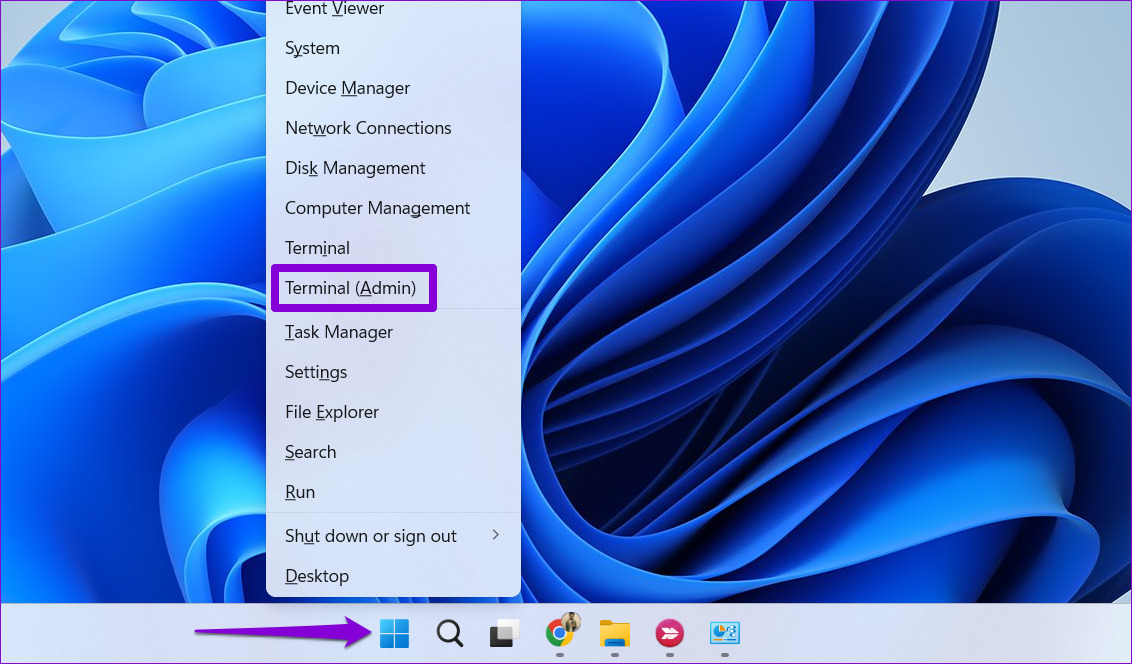
Windows collects and stores the DNS cache locally on your computer for better internet speed and performance. If this data becomes corrupt for some reason, it can cause your network connection to slow down. Thankfully, getting rid of the redundant DNS cache on Windows is easy. Step 1: Right-click on the Start icon and select Terminal (Admin) from the list.
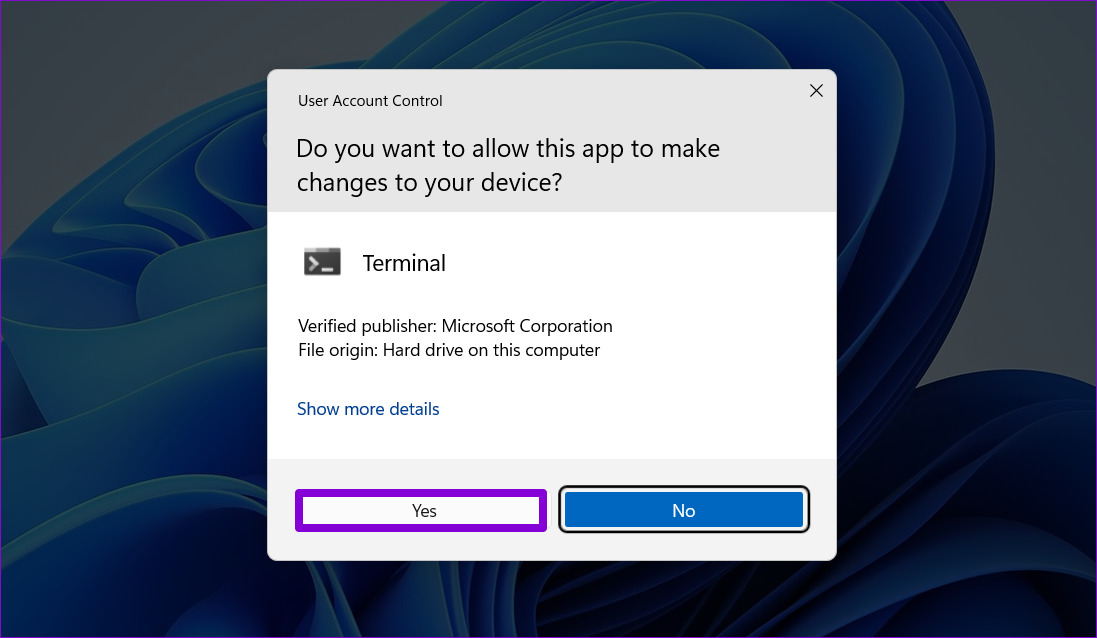
Step 2: Select Yes when the User Account Control (UAC) prompt appears.
Step 3: In the console, paste the following command and press Enter.
6. Change DNS Servers
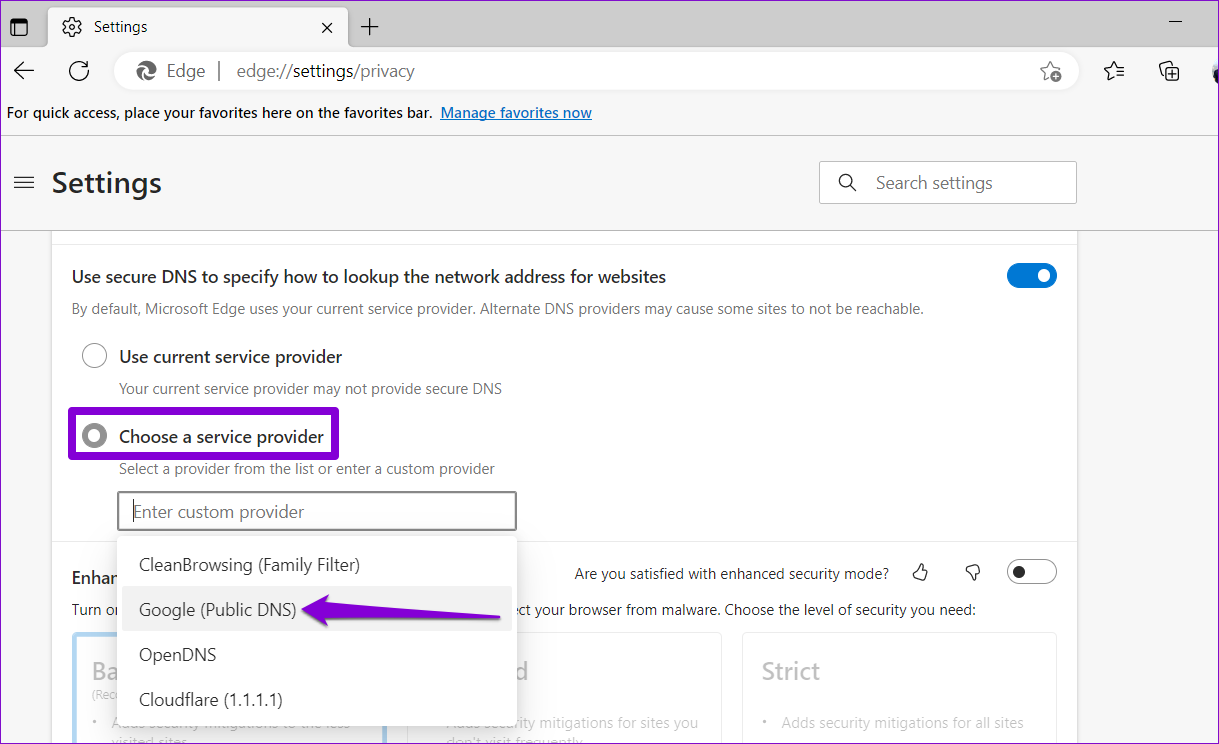
Problems with your Internet Service Provider’s DNS server can also result in slow download speeds in Edge. If that’s the case, switching to a more reliable DNS service, such as Google DNS or Cloudflare, will help. Step 1: In Edge, type edge://settings/privacy in the URL bar at the top and press Enter. Then, scroll down to the Security section.
Step 2: Select the ‘Choose a service provider’ option. Then, select from the available DNS providers.
Alternatively, you can change the default DNS server from the Windows Settings app.
7. Temporarily Disable VPN
Although using a VPN connection has its benefits, it can sometimes impact network download speeds. You can temporarily disable your VPN connection to see if it makes a difference when downloading files in Edge.
8. Disable Extensions
Third-party extensions in Edge can also conflict with Edge processes and slow them down. This can happen if some of your extensions are outdated or incompatible. You can disable all the extensions to see if that improves the download speeds in Edge. Type edge://extensions in the address bar at the top and press Enter. Use the toggles to disable all the extensions one by one. Then, try downloading your files again.
9. Clear Browsing Data
Edge saves temporary files in its database to improve its performance. Overburdening browsing data, on the other hand, can harm on Edge’s performance and cause problems. You can clear Edge’s browsing data to improve download speeds as a last resort. Press Ctrl + Shift + Delete shortcut to open the Clear browsing data panel. Select the ‘Cookies and other site data’ and ‘Cached images and files’ checkboxes. Then, hit the Clear now button.
Need for Speed
Slow download speed is one of those issues that you cannot tolerate. Applying the fixes mentioned above will help you speed up your Edge downloads. If you come across any other methods for increasing download speeds in Edge for Windows, share them with us in the comments below. The above article may contain affiliate links which help support Guiding Tech. However, it does not affect our editorial integrity. The content remains unbiased and authentic.
