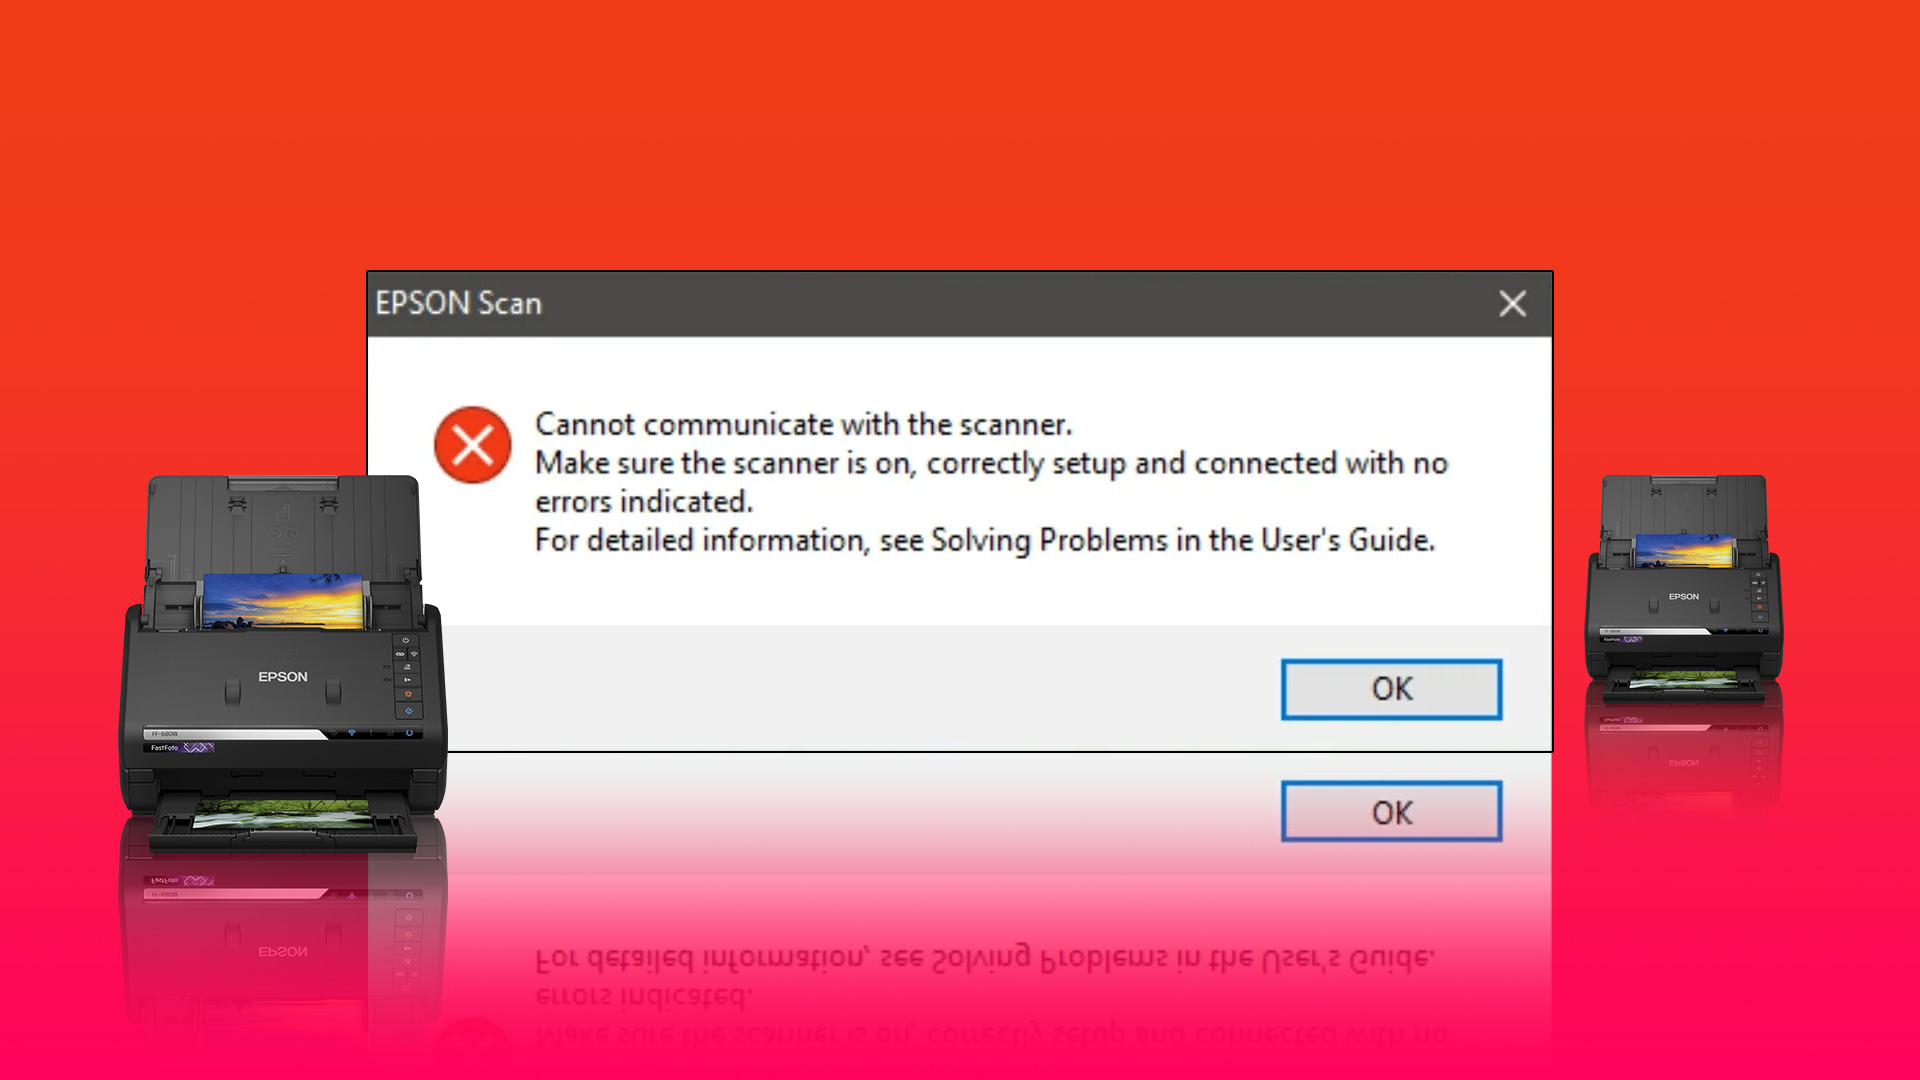
Whether you’re experiencing this issue with your multi-function printer or standalone scanner, the following troubleshooting tips should help you fix the issue for good. So, let’s check them out.
1. Check Connection
The first thing you need to do is to check the connection between the scanner and your computer. While at it, ensure that your scanner’s adapter is securely connected to the scanner and a working electrical outlet. If it’s a wireless scanner, ensure that the PC and the scanner connect to the same network.
2. Remove and Re-Add Your Scanner
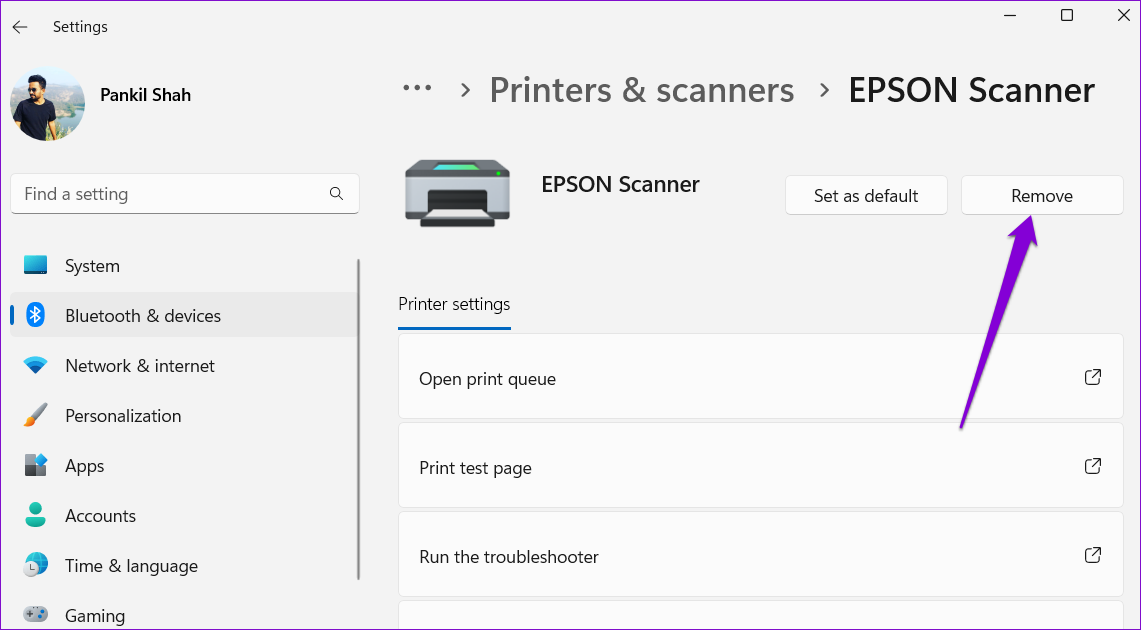
Next, try removing the scanner from your computer and setting it up again. This should help resolve any problems caused by incorrect configuration. Follow the steps to remove your scanner from Windows 11: Step 1: Right-click on the Start icon and select Settings from the list.
Step 2: Select Bluetooth & devices from the left sidebar and go to Printers & scanners.
Step 3: Select your scanner from the list.
Step 4: Click the Remove button to delete it.
Step 5: Head back to the Printers & scanners menu. Step 6: Click on Add device and follow the on-screen prompts to set up your scanner again.
3. Configure Scanner Services
Windows requires certain services to run in the background for the scanner to function properly. For instance, Windows Image Acquisition (WIA) is a service responsible for acquiring images from your scanner. If one of the scanner-related services fails, Windows will have trouble communicating with the scanner. Here’s what you can do to fix it. Step 1: Press the Windows key + R to open the Run dialog. Type services.msc in the box and press Enter.
Step 2: Scroll down to locate the Windows Image Acquisition (WIA) service. Double-click on it to open its properties.
Step 3: Use the drop-down menu next to Startup type to select Automatic. Then, hit Apply, followed by OK.
You’ll need to repeat the above steps to configure Remote Procedure Call, DCOM Server Process Launcher, RPC Endpoint Mapper, and Shell Hardware Detection services. After that, restart your PC and try using your scanner again.
4. Run the Hardware and Devices Troubleshooter
The hardware and devices troubleshooter on Windows can automatically detect and fix any common issues. You can run this particular troubleshooter if Windows 11 is still won’t connect to your scanner. Step 1: Press the Windows key + R to open the Run dialog. Type msdt.exe -id DeviceDiagnostic in the box and press Enter.
Step 2: In the Hardware and Devices window, click Next to initiate the scan.
After running the troubleshooter, restart your PC to apply all the changes.
5. Run SFC and DISM Scans
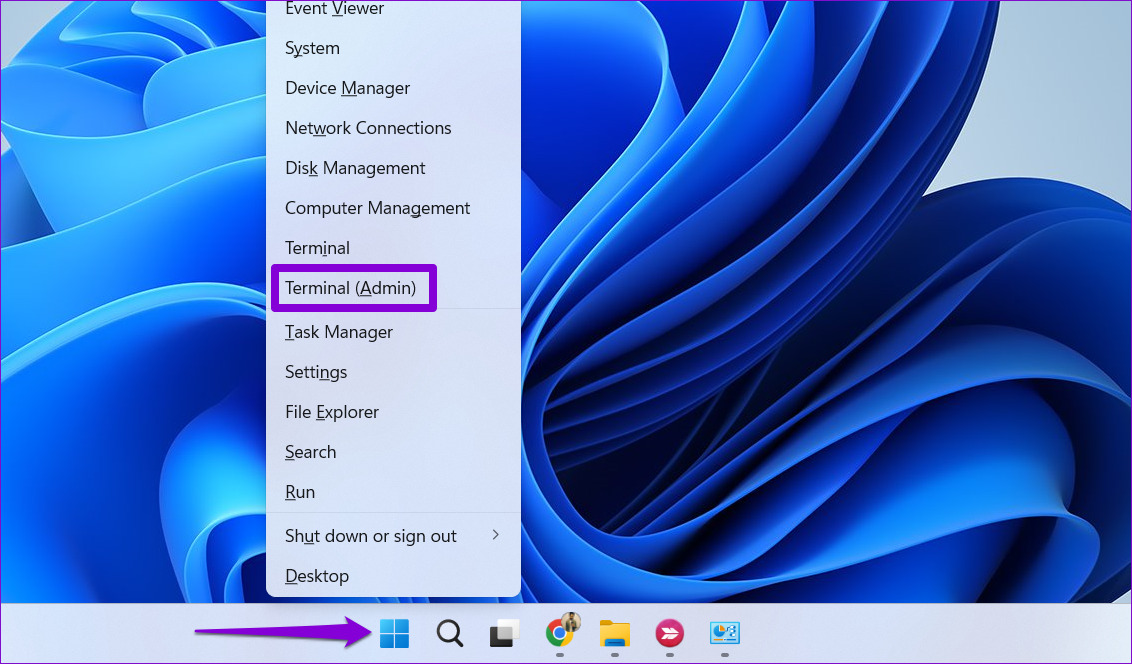
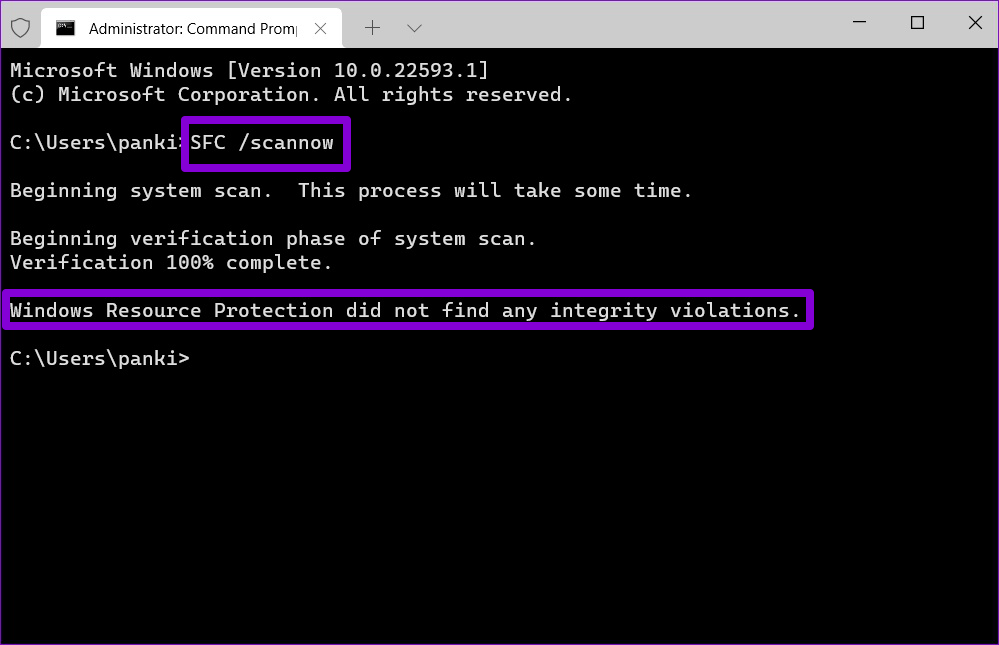
Windows 11 may encounter such issues if some system files are corrupted or missing. In such cases, running the SFC (or System File Checker) scan can help you repair those damaged system files. Here’s how to run it. Step 1: Right-click on the Start icon and select the Windows Terminal (Admin) option from the resulting menu.
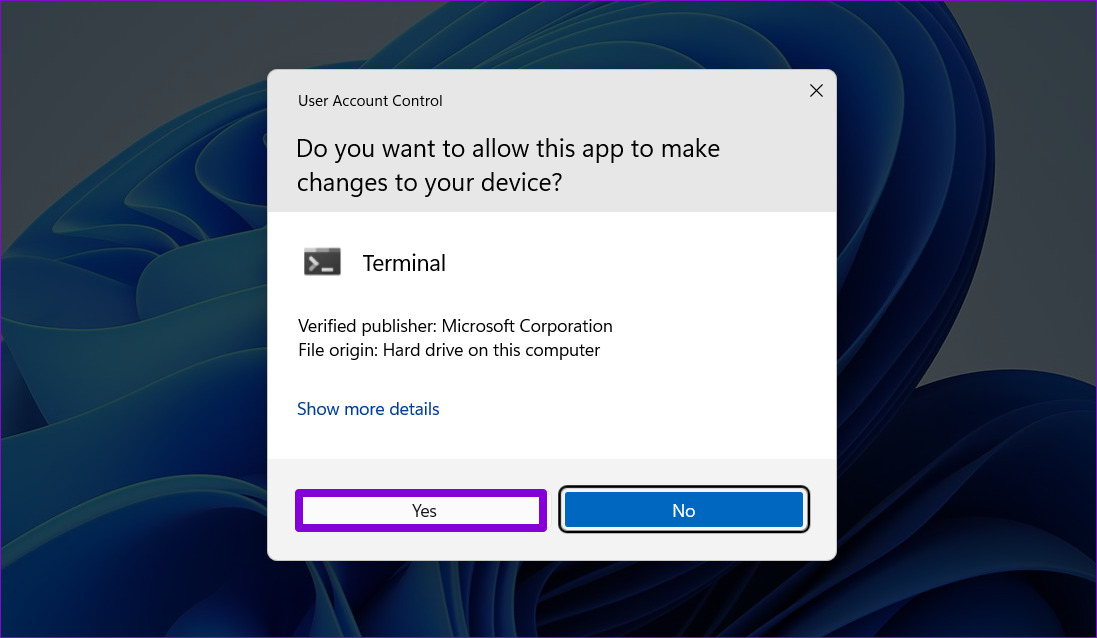
Step 2: Select Yes when the User Account Control (UAC) prompt appears.
Step 3: Type the command mentioned below and press Enter.
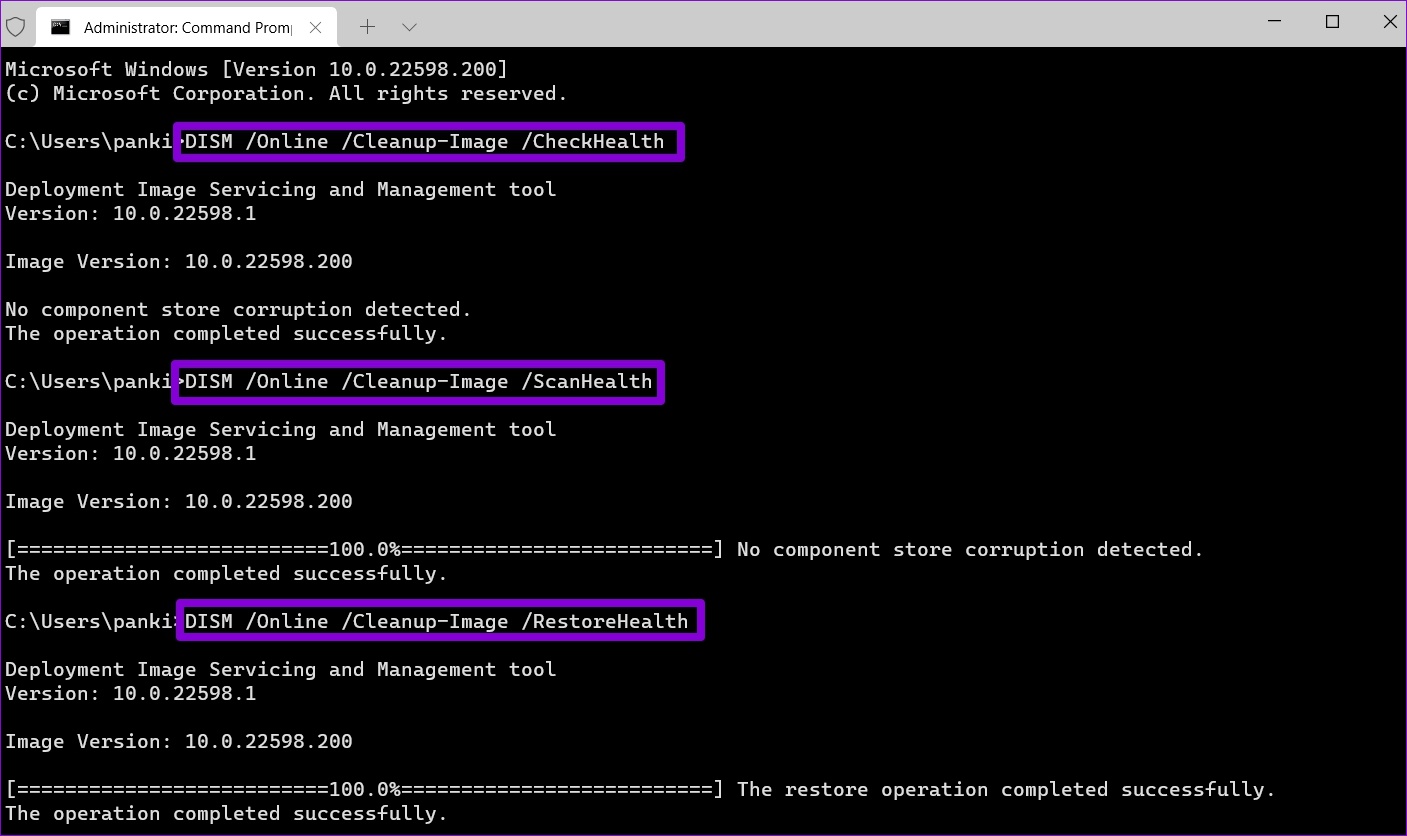
After completing the scan, a message will appear that’ll convey whether or not the scan was successful. If it was not, you’ll also get instructions to fix the problematic files. Next, you need to run the DISM (Deployment Image Servicing and Management) scan. Besides scanning system files, it will download internal system files from Microsoft’s server if required. Open Windows Terminal with admin rights again and run the following commands one by one.
Restart your PC after running the above commands. Following that, your scanner should work fine.
6. Update or Reinstall Scanner Drivers
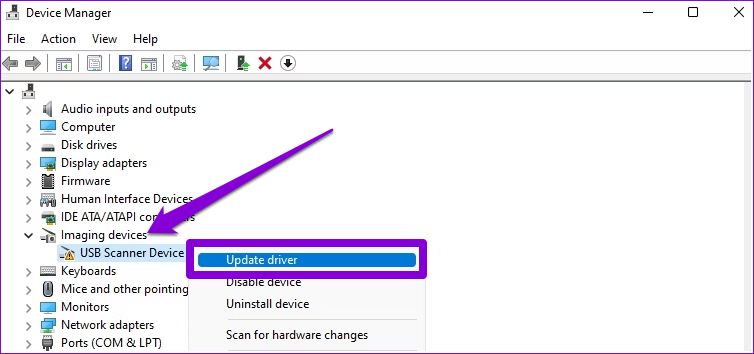
Outdated or malfunctioning drivers can also prevent Windows 11 from connecting with your scanner. In most cases, you can resolve the issue by updating the driver. Step 1: Right-click on the Start icon and select Device Manager from the list.
Step 2: Expand Imaging devices, right-click on your scanner, and select Update driver.
Follow the on-screen prompts to finish updating the driver. If the issue persists even after this, there’s a chance that your scanner driver is corrupt. In that case, you’ll have to uninstall the driver.
Once removed, restart your computer to let Windows should automatically install the missing driver when it boots next.
Troubleshoot Scanner Issues on Windows
Such issues with your scanner should not force you to scan documents and images with your smartphone. One of the solutions listed above should get your scanner to work again. Let us know which one worked for you in the comments below. The above article may contain affiliate links which help support Guiding Tech. However, it does not affect our editorial integrity. The content remains unbiased and authentic.
