At least, not by default. This can be annoying since you wouldn’t want to lose out on all your data on the watch every time you switch to a new phone. It’s a pain to set everything up from scratch. Thankfully, there’s a neat little workaround for this issue. This trick will let you pair your Wear OS smartwatch with a new phone without a factory reset.
What Is the Factory Reset Issue on Wear OS While Pairing With a New Phone
A Wear OS smartwatch pairs with the Wear OS app from the Google Play Store. This process is quite straightforward if you’re pairing your smartwatch for the first time with a phone. The problem occurs when you switch to a phone.
Wear OS doesn’t allow you to pair the smartwatch with a new phone without resetting the smartwatch. Also, resetting the watch removes all your watch faces, offline music, podcasts, settings, etc. And it’s painful to download it all again. Using this method will retain the data on your watch while allowing you to pair it with a new smartphone.
How to Pair a Wear OS Smartwatch With a New Phone Without Resetting It
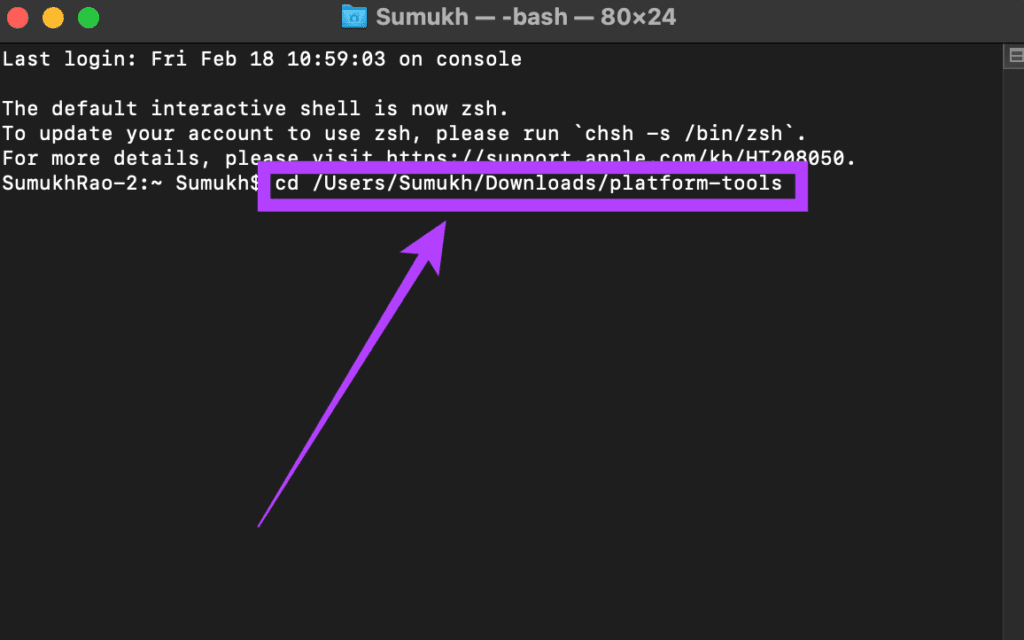
The trick is to unpair the smartwatch and clear the data of Google Play Services. You can do that using the ADB (Android Debug Bridge) on a computer. Things are a bit technical and it helps if you know your way around the Command Prompt on Windows. Setting up ADB Step 1: Download the relevant ADB files based on the OS of your computer. Get ADB for Windows Get ADB for Mac Get ADB for Linux Step 2: Extract the ZIP file to a location of your choice. On Windows, hold the Shift key and right-click on the extracted file, and select ‘Open command window here’ option. On Mac and Linux, open Terminal type in cd and hit Enter to change the active directory. Then, drag the folder you unzipped and drop it in the Terminal window. You will now get a path to that folder in the Terminal. Press Enter.
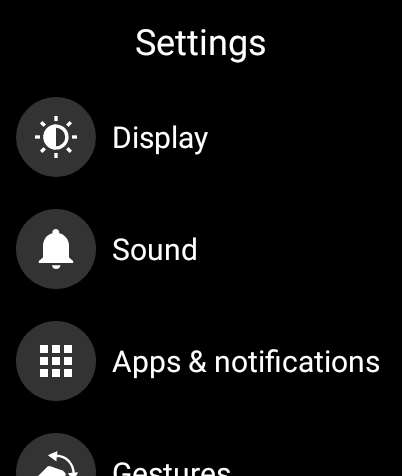
Step 3: The next step is to enable ADB debugging on the watch. For this open the Settings app on your smartwatch.
Step 4: Scroll down to the System section and tap on it.
Step 5: Now, tap on About.
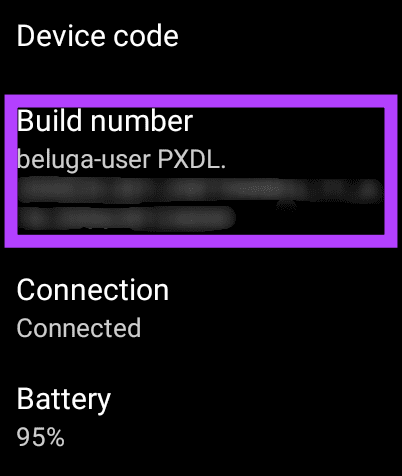
Step 6: Scroll till you find the Build Number. Tap on it 7 times repeatedly to unlock Developer Options on your watch.
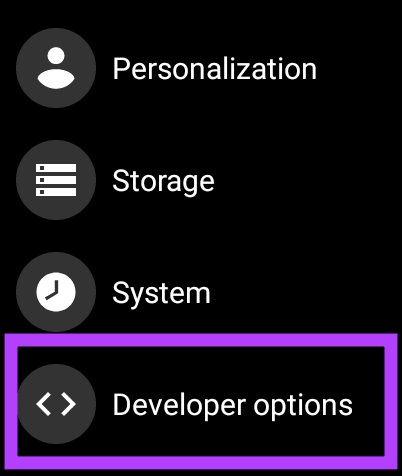
Step 7: When you open the Settings app, you will now find Developer Options at the bottom of the page. Tap on it.
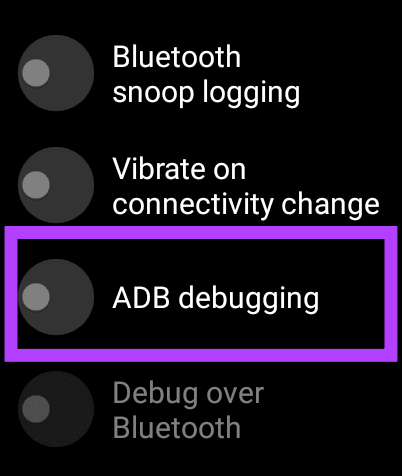
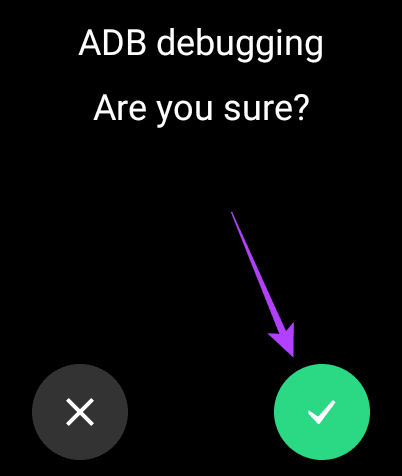
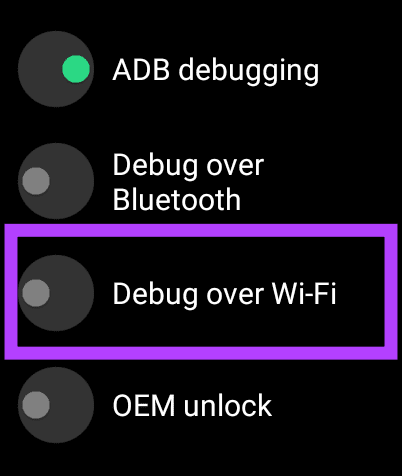
Step 8: Tap on the toggle next to ADB debugging to enable it. Tap on the green tick when prompted to confirm. Step 9: Scroll down slightly and also enable the toggle next to Debug over Wi-Fi.
Step 10: The watch may initially display a message saying Unavailable that will soon be replaced by a string of characters including the IP address. This means ADB over Wi-Fi has been enabled. Note down the IP address displayed here. It’s going to be something like: 192.168.1.325:5555.
Using ADB to Unpair the Watch From the Old Phone
Now that you have set up ADB on your computer and have enabled ADB debugging via network on your smartwatch, we can get to the main part of the tutorial.
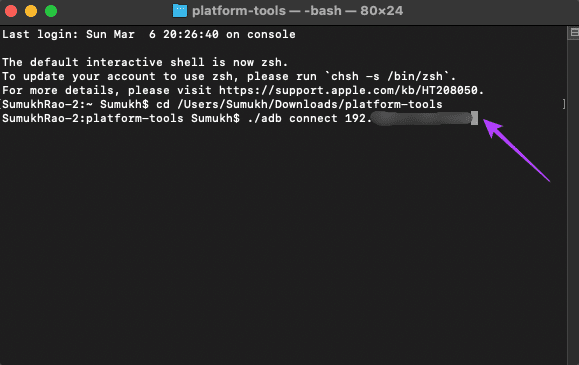
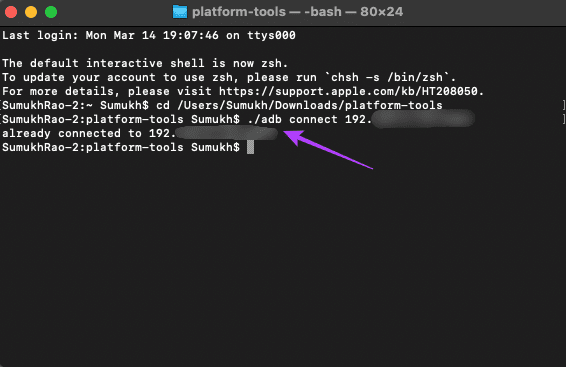
Step 1: In the terminal window opened earlier, type in ./adb connect
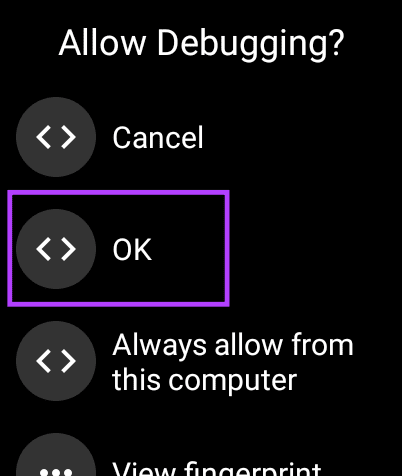
Step 2: You will now see a prompt on your watch to allow the ADB connection. Select OK.
Step 3: The terminal window will now show that you are connected to the watch.
Step 4: Enter the following command. If you see a Success message in the terminal, your smartwatch will reboot.
Step 5: Once the smartwatch is back up and running, let it settle for a few minutes, allow it to connect ot your Wi-Fi network, and then connect it back to ADB by repeating the steps above. Step 6: Run in the following command in the Terminal to make your smartwatch discoverable to the new phone and hit Enter.
Step 7: Open the Wear OS app on your new smartphone and you will be able to pair the smartwatch with your new phone. That’s it. You have successfully paired your Wear OS smartwatch with a brand new phone without erasing any of the data.
Reconnect the Watch Without Losing Data
Save your time and connect your smartwatch using this method mentioned above. Setting up a new device can take unusually long, especially on a platform like Wear OS. This is how you won’t have to customize it all over again either. The above article may contain affiliate links which help support Guiding Tech. However, it does not affect our editorial integrity. The content remains unbiased and authentic.








![]()