Speaking of customization, Microsoft gives you the option to change the look of your mouse cursor on Windows 11. Whether you’re just bored of the generic cursor or you want it to be more prominent and easily visible, you can change the look of the cursor with just a few clicks. Here’s how you can customize the mouse cursor on your Windows 11 PC.
How to Change the Color and Size of the Mouse Cursor
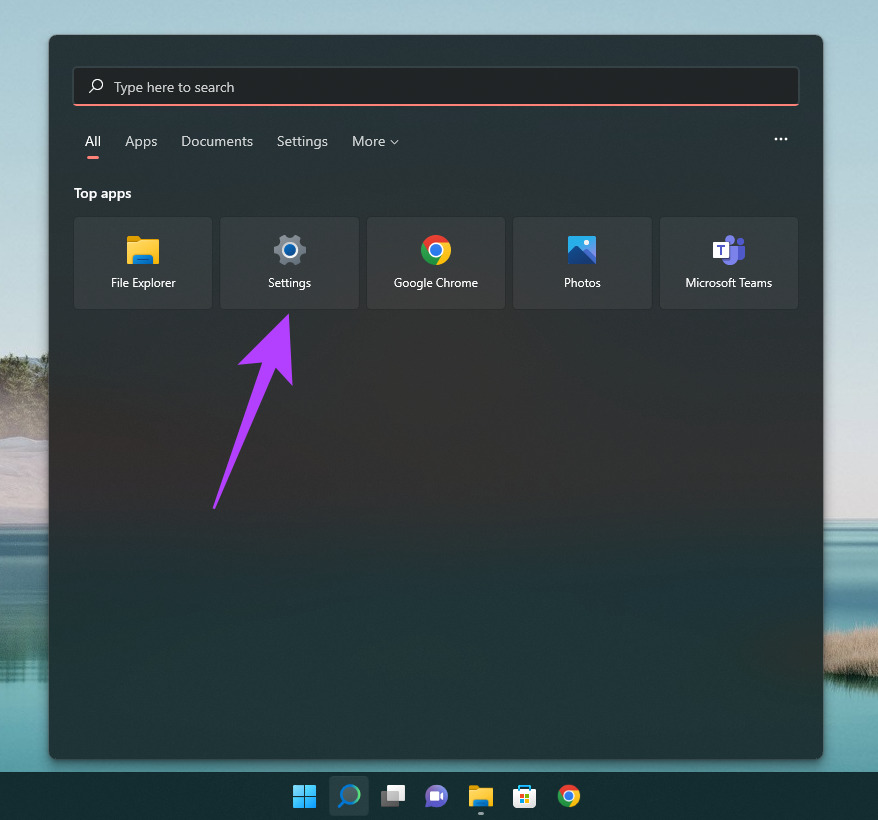
There are a few default cursor options in Windows 11 if you want to change the way mouse pointer looks. You can choose from these default options and change the color and size of the cursor. Here’s how to do it. Step 1: Click on the Start button in the taskbar and launch the Settings app.
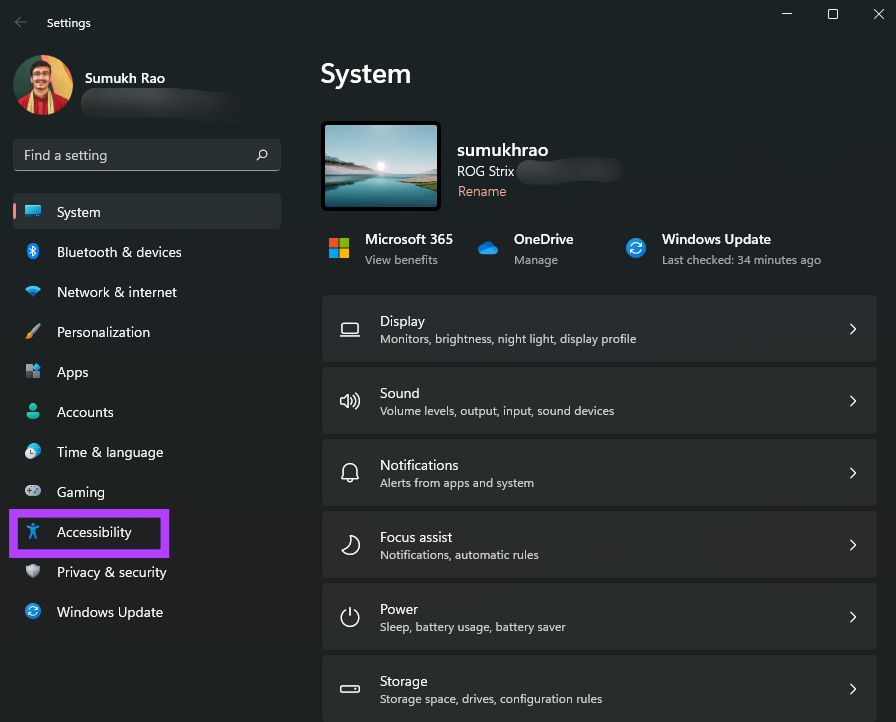
Alternatively, you can use the search bar to look for Settings. Step 2: Navigate to the Accessibility option using the pane on the left.
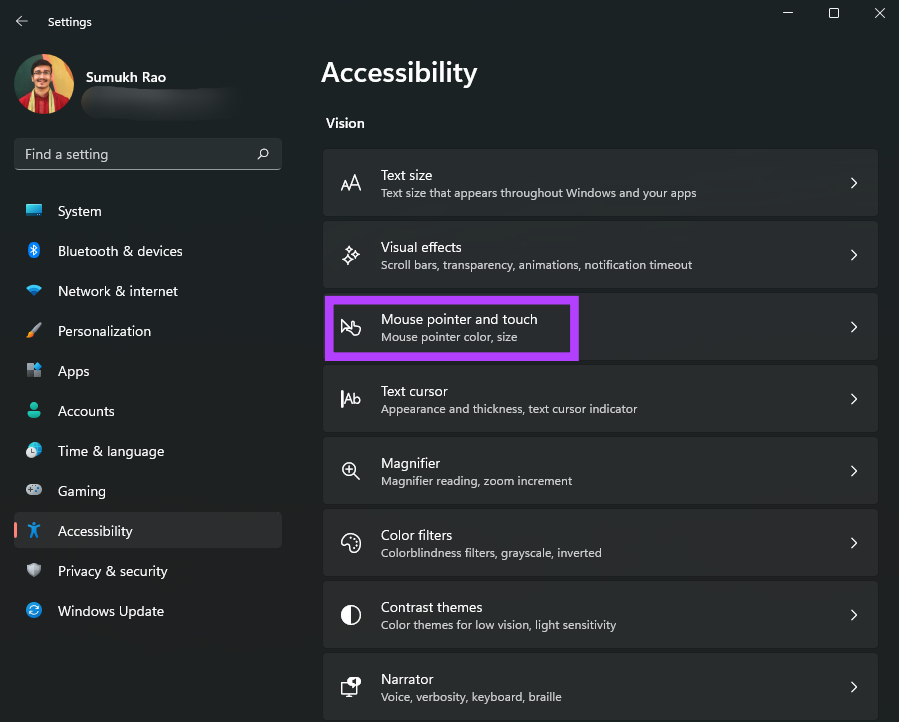
Step 3: Scroll down to the ‘Mouse pointer and touch’ section and click on it.
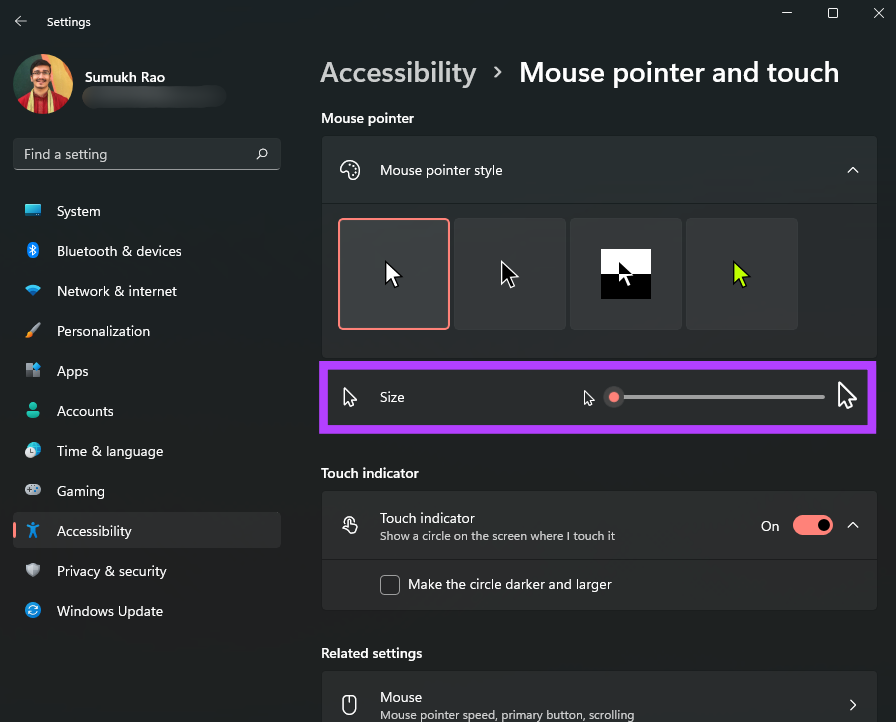
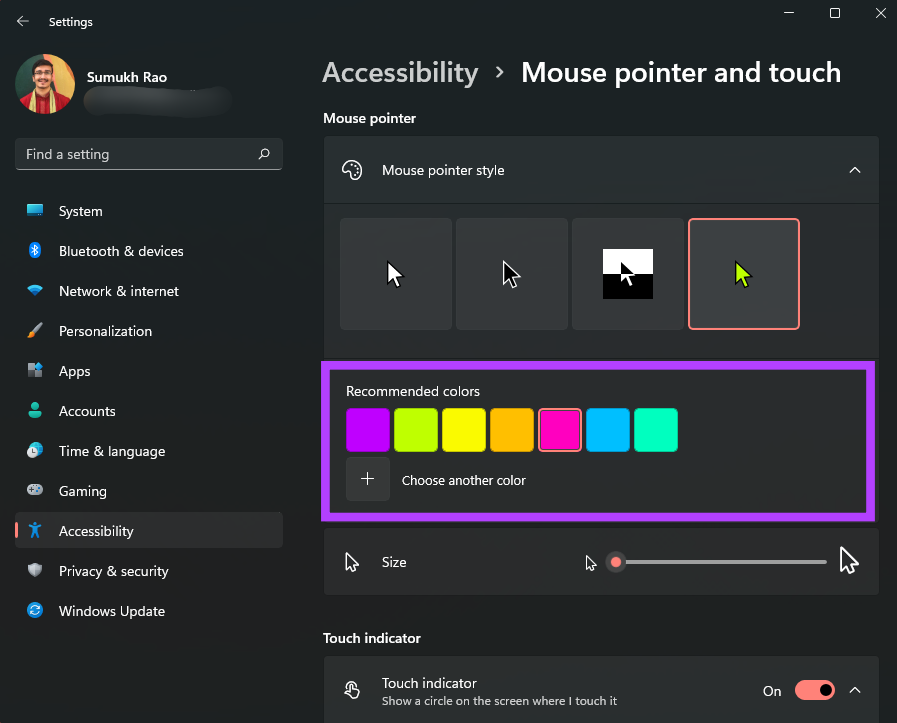
Step 4: You can choose from 4 types of mouse pointers. Click on the one you like to see it in effect.
Step 5: Use the slider under the cursor style options to adjust the size of the mouse pointer.
Step 6: The right-most mouse pointer style supports different colors. If the option is available, you will see a color palette to choose from.
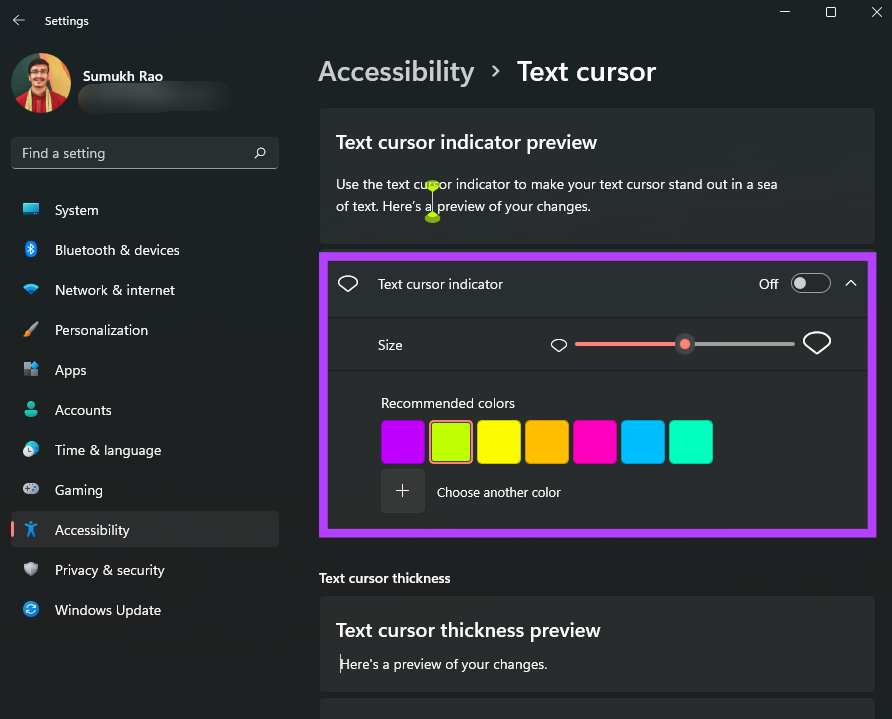
Step 7: Scroll down and click on Text cursor to modify it.
Step 8: You can enable or disable the text cursor indicator and change the color and size.
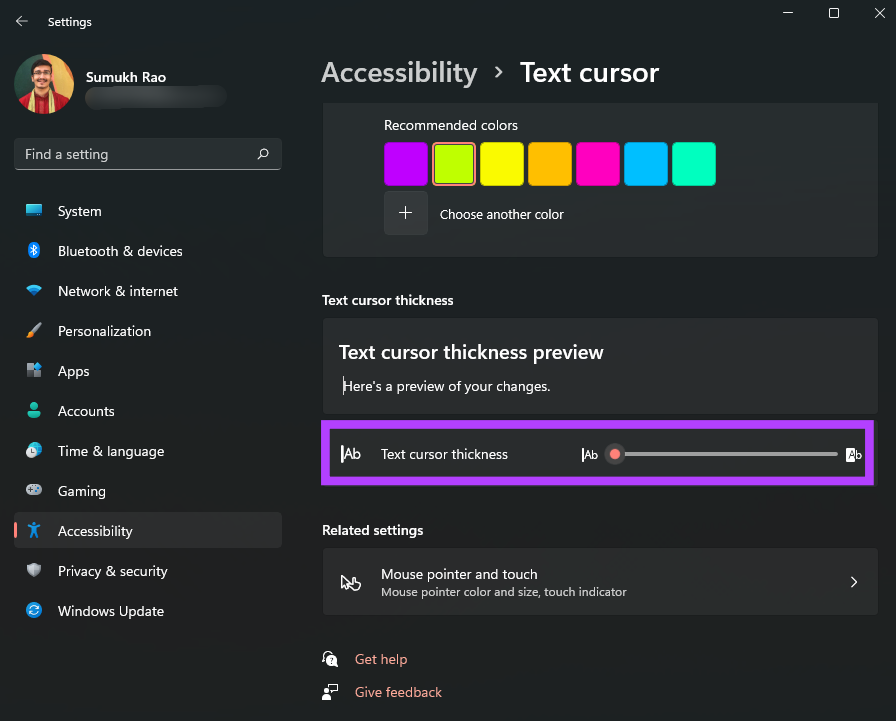
Step 9: There’s also a slider at the bottom to adjust the thickness of the text cursor.
The Windows 11 offers the options shown above as the default style and alterations.. However, you can go one step further and change the mouse cursor to a custom icon or image of your choice. You won’t have to limit yourself to the four available options. Here’s how to do it.
How to Change the Mouse Cursor to a Custom Icon
If you love customizing the interface as per your choices, Windows 11 does let you completely change the mouse pointer’s look and shape as well. Here’s how to add a custom icon as your mouse pointer in Windows 11. Step 1: Download a custom cursor pack or an icon that you wish to use as your cursor. There are plenty that you can find on the internet from various sources. If you don’t want to download third-party options, there are some icons by default that you can use in Windows 11. Step 2: Click on the Start button in the taskbar and launch the Settings app.
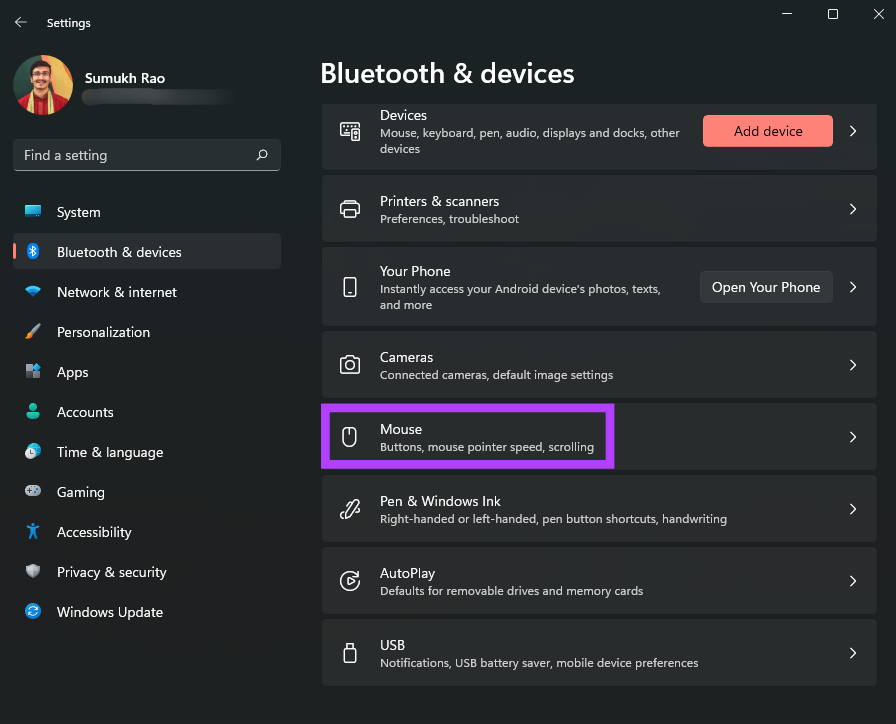
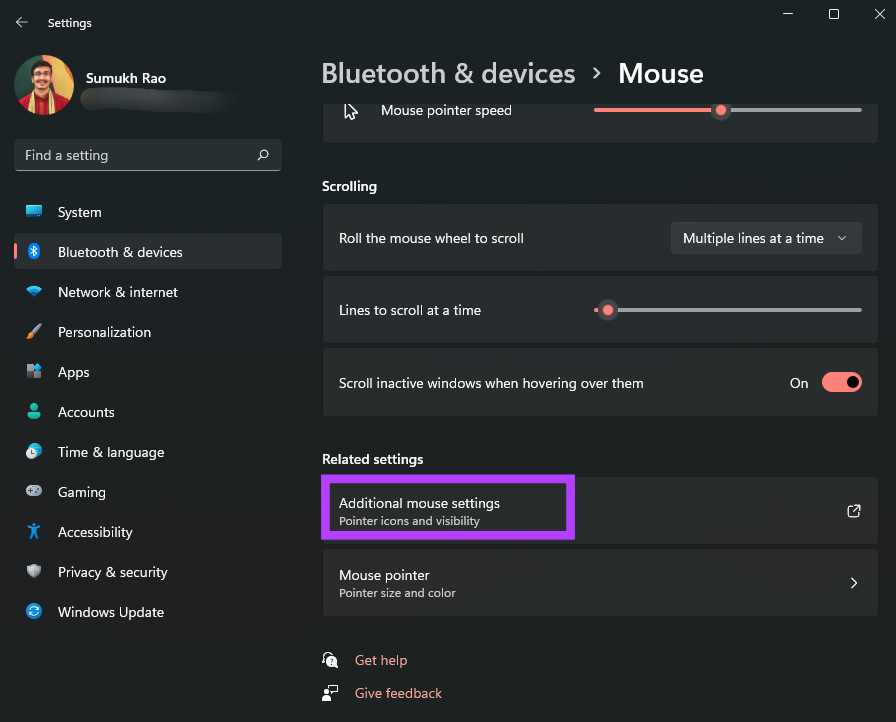
Step 3: Navigate to Bluetooth & devices in the left pane.
Step 4: Scroll down and select the Mouse option on the right.
Step 5: Click on Additional mouse settings.
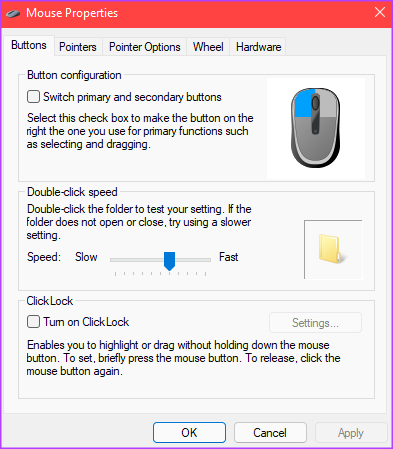
Step 6: This will bring up a dialog box with Mouse Properties. You can change advanced settings related to the mouse cursor from the window.
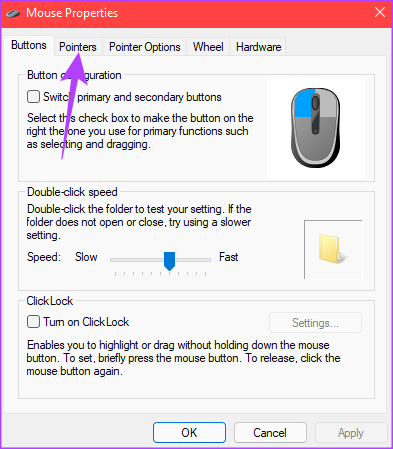
Step 7: Click on the Pointers tab at the top.
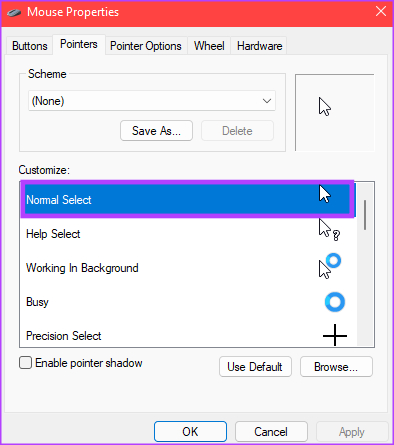
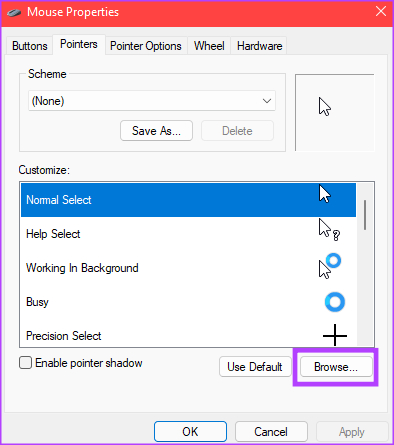
Step 8: In the Customize section, click on the cursor type that you want to change. You can change all the cursor types listed here.
Step 9: Once you’ve selected the pointer to change, click on Browse.
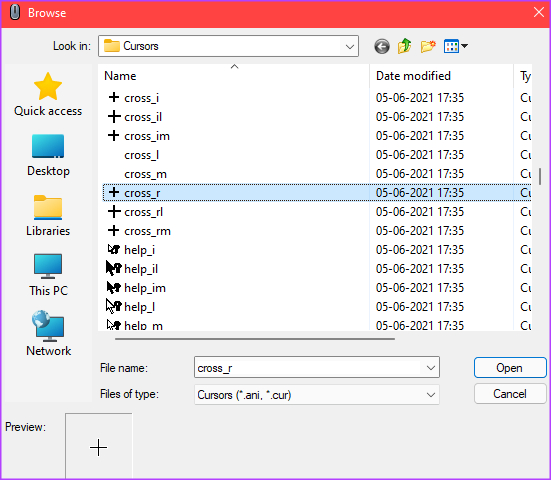
A file explorer window should pop up now. If you have downloaded a third-party cursor pack, you can navigate to the folder it is saved in. Else, you can use the cursor options listed by default.
Step 10: Select the mouse pointer you want to use and then click on Open.
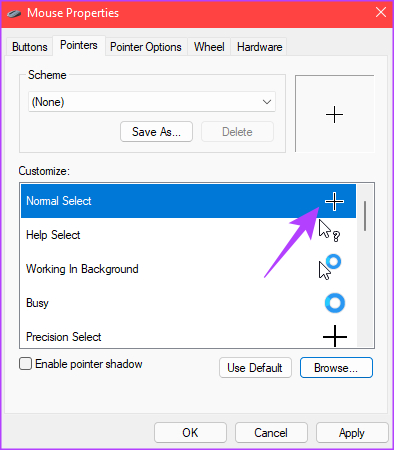
Windows will change the mouse pointer to your pick. You may continue to select other options. Leave them as they are if you’re done making changes.
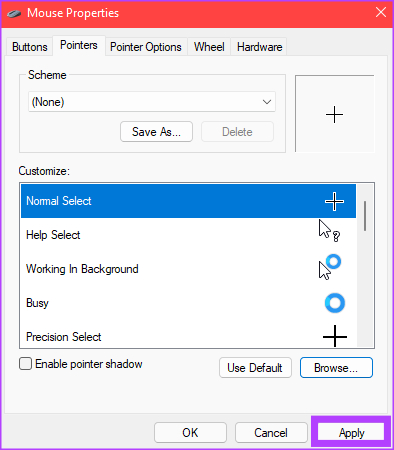
Step 11: After changing all the desired cursors, click on Apply and then on OK.
Windows will apply all the chosen changes to the mouse pointer. If you change your mind later, you can always follow the above steps and customize it to something else. Also, you can download several third-party icons and cycle through them to see which one looks the best to you. To match your cursor customizations, check our guides on how to change icons on Windows 11 and personalize the Start menu for an even more customized experience.
Use a Unique Mouse Cursor
The best part of having customization options is making aspects of your computer appear the way you want them to. Just download a funky icon of your choice and show off your brand new unique mouse pointer! The above article may contain affiliate links which help support Guiding Tech. However, it does not affect our editorial integrity. The content remains unbiased and authentic.
