You can’t access your hard drive files when it fails to connect to your computer in the first place. Instead of using another computer or finding inconvenient methods to access your files, use the steps below to troubleshoot the external hard drive not showing up in Windows 11.
1. Check the Cable and USB Connection
Using the supplied cable to connect your external hard drive to the PC is a good idea. You can avoid using the cable from another company’s hard drive. Also, closely inspect the cable. Get a new cable if you notice any physical damage on the stock one. Due to a loose connection, you may not see an external hard drive in the Windows File Explorer menu. You should remove the hard drive and reconnect it properly. Some external hard drives come with a dedicated power button. Make sure to turn on the device after connecting to the PC.
2. Use Another USB Port
Most Windows PCs come with several USB-A ports to use. If a specific USB port is malfunctioning or not detecting the hard drive, disconnect the device and connect it to another port.
3. Run Devices and Hardware Troubleshooter
Windows packs a dedicated troubleshooter tool to fix hardware connections. Here’s how you can use it and fix the external hard drive not showing up in Windows 11. Step 1: Press Windows + R keys to open the Run dialog box. Step 2: Type msdt.exe -id DeviceDiagnostic in the Run box and hit Enter.
Step 3: Hit Next on the dialog box.
Let the troubleshoot, diagnose, and fix the problem.
4. Use Disk Management Tool
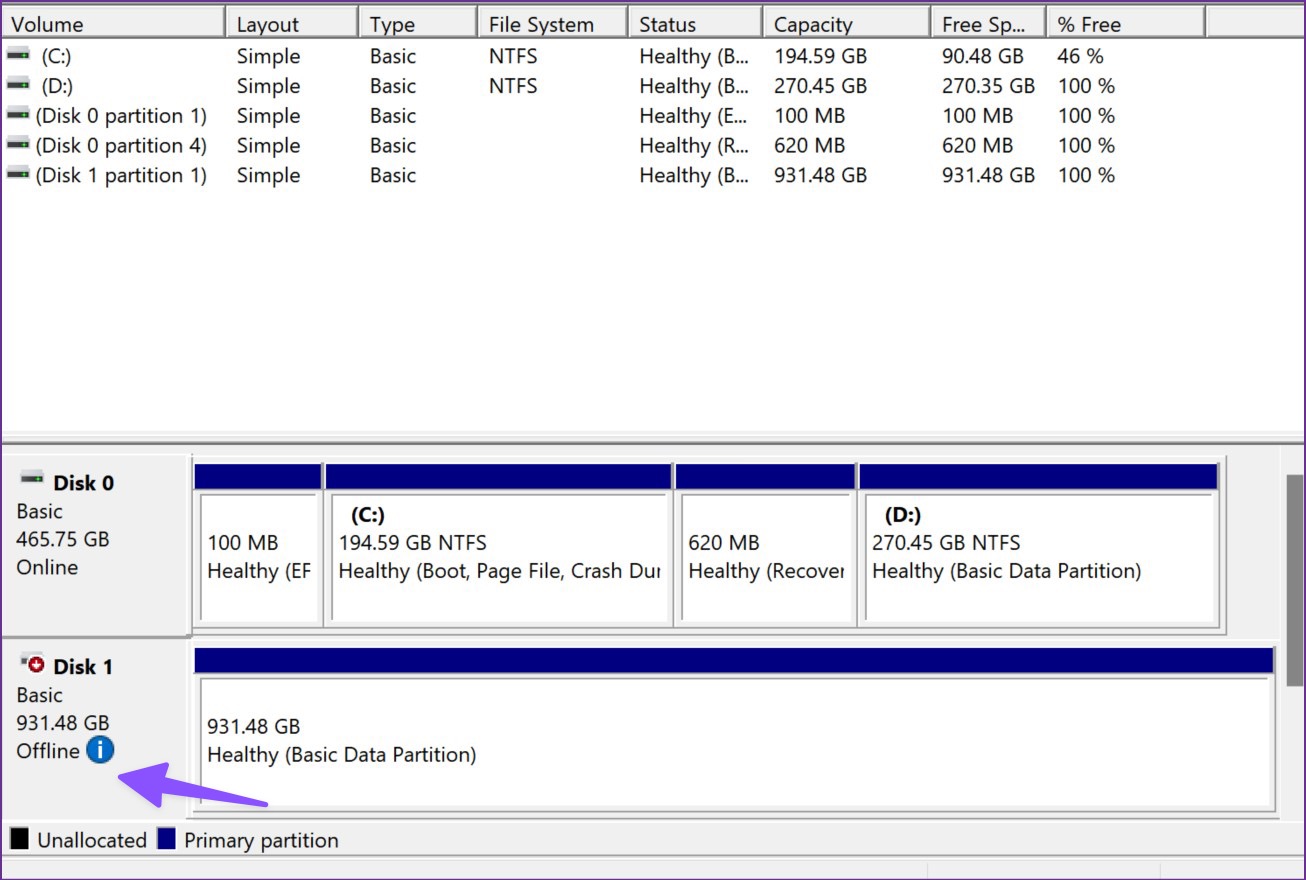
If you don’t see the connected drive in the File Explorer menu, use the Disk Management tool on Windows. You can check all the drives attached to your computer, review size, check partitions, and other statistics. You can also use the Disk Management tool to activate your hard drive. Let us show you how. Step 1: Press the Windows key and search for disk management.
Step 2: Hit Enter and open the tool. Connect your external hard drive with your PC. Step 3: If your hard drive is offline, it won’t show up on the computer.
Step 4: Right-click on your hard drive name and select Online from the context menu.
The system will open hard drive content in a new File Explorer window.
5. Use Command Prompt
You can use Command Prompt to fix issues with your drives. The command may help you troubleshoot connection problems with an external hard drive. Step 1: Press the Windows key and type cmd to search for it in the Windows Search. Step 2: Select ‘Run as administrator.’
Step 3: Type chkdsk /f X: (replace X with your relevant drive’s letter) and hit Enter.
Run the command, let the system fix drive problems, and try again.
6. Enable Device From Device Manager
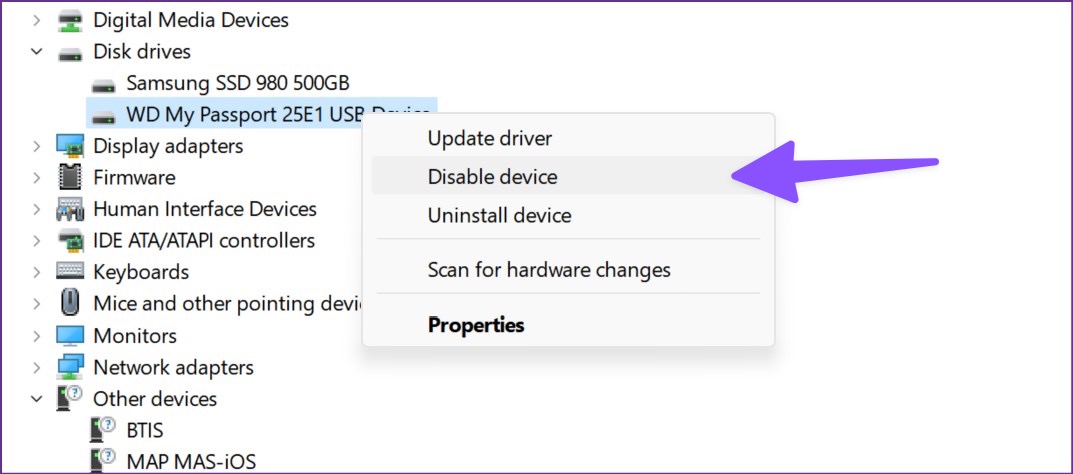
If the system disables your external hard drive, you won’t find the same in the File Explorer menu. Here’s how you can enable it using Device Manager. Step 1: Right-click on the Windows key to open Device Manager.
Step 2: Expand the Disk drive and find your hard drive from the list.
Step 3: Right-click on it and select Enable device from the context menu.
7. Reinstall Drivers
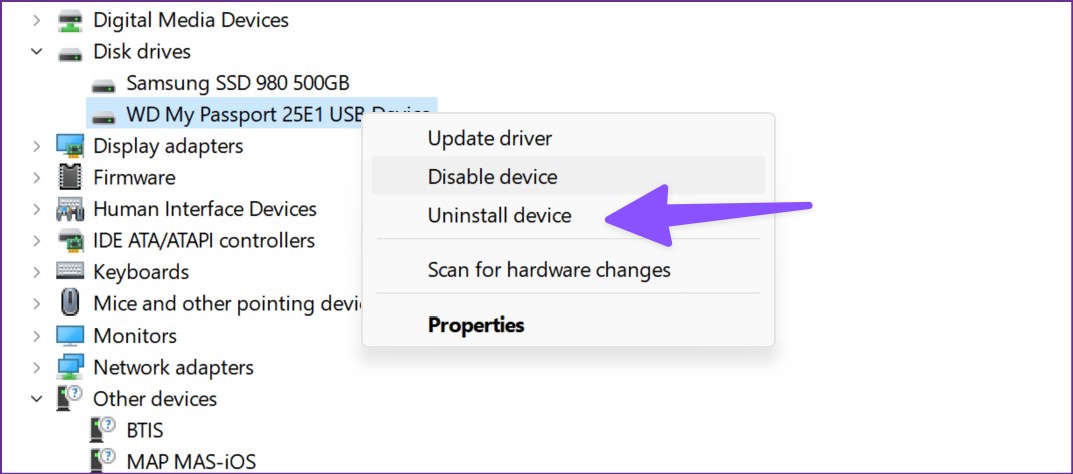
It’s time to reinstall hard drive drivers if it’s still not showing up in Windows 11. Step 1: Open the Device Manager menu (refer to the steps above). Step 2: Find your hard drive from the Disk drives list and right-click on it.
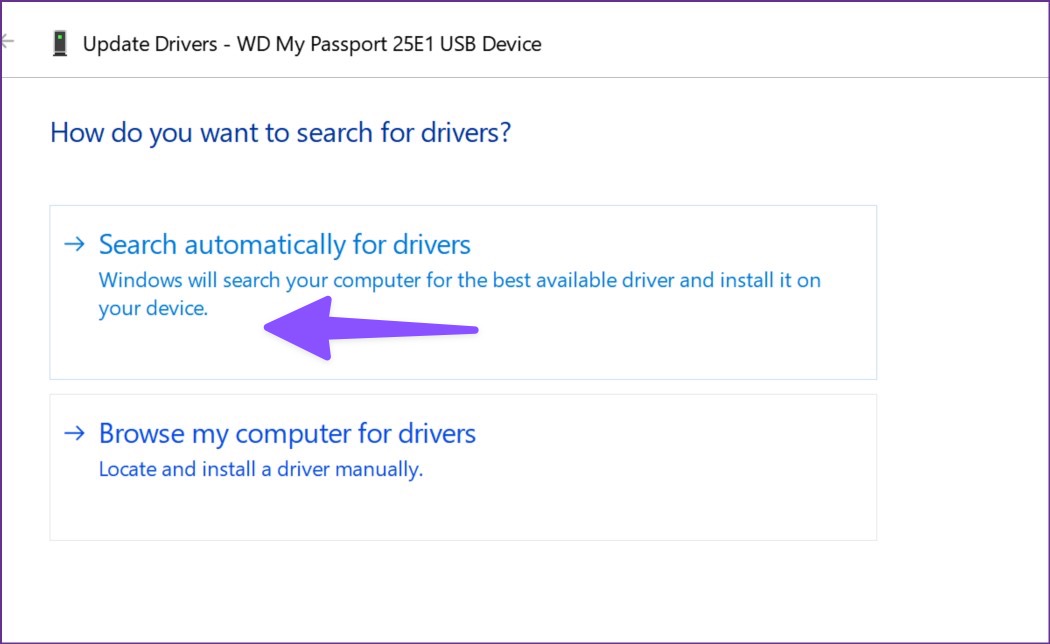
Step 3: Select Update Driver from the context menu.
Step 4: Select ‘Search automatically for drivers’.
Device Manager will start searching for the latest drivers on your computer. If it doesn’t detect any, go back to the same menu. Step 5: Select Uninstall device from the same menu and confirm your decision.
Restart your computer and reconnect your external hard drive. It should trigger a fresh installation of drivers on your PC.
8. Enable Auto Mounting
Whenever you connect a new external hard drive to a Windows 11 PC, it assigns a letter to the device and maps the location of the drive. The process is called auto mounting. You can enable automatic mounting of the drives (especially, the external ones) using the MountVol tool to fix the external hard drive not showing up in Windows 11. Step 1: Open Command Prompt as Administrator (check the steps above). Step 2: Run the following command.
mountvol /E It will enable the Auto Mount function. You can remove all previously assigned drive letters by running ‘mountvol /R’ command. Reboot your PC and try connecting an external hard drive again.
9. Update Firmware
Popular hard drive OEMs like Western Digital offers dedicated software to install the newest drivers and ensures compatibility with the latest software like Windows 11. You can head to OEM (original equipment manufacturer) website and download relevant firmware to connect hard drivers without any issue.
Access Your External Hard Drive
If none of the tricks work, it’s time to format your external hard drive and wipe all data to start from scratch. Alternatively, you can borrow or get another HDD to take a backup of your existing data on your computer. You’ll need to take care of the external hard drive when transporting, make sure not to bend the supplied USB cable, and develop a habit of disconnecting the drive safely using the Windows Eject feature. The above article may contain affiliate links which help support Guiding Tech. However, it does not affect our editorial integrity. The content remains unbiased and authentic.
