There are several reasons behind that. For starters, dark mode in iOS 13 works quite differently compared to similar functionality on other platforms. Furthermore, it is quite new, so there are bound to be various niggles that will prevent it from functioning normally. So if you have any qualms as to how dark mode functions on your iPhone or iPad, then here’s my take on what you can do to get it up and running properly.
1. Enable Dark Mode Manually
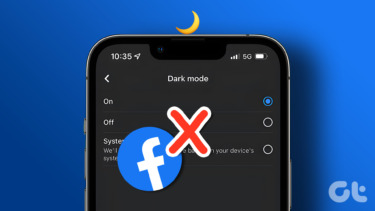
Despite how synonymous dark mode is with iOS 13, you must turn it on manually. If you just upgraded iOS, then you might wonder why the user interface isn’t draped in black out of the box. So you need to dive into the Control Center (swipe down from upper-right edge of screen), long-press the Brightness bar, and then tap the icon labeled Dark Mode. You should immediately start to see the screen dim slightly. To check out dark mode in all its glory, head into a native app such as Reminders, Notes, or Messages.
2. Disable Automatic Scheduling
Is dark mode turning off automatically? If that is the case, then dark mode on your iPhone or iPad is subject to an appearance schedule. Which means that the functionality will kick in at night automatically and go away in the morning. Surprisingly, I like it that way, since having dark mode on at all times can be a strain on the eyes when outdoors. But if you want to stop dark mode from turning off without your consent, here’s how to do that. Start by opening the Settings app on your iPhone or iPad. Next, scroll down, and then tap Display & Brightness. Underneath the Appearance section, turn off the switch next to Automatic. You have now disabled the automatic appearance schedule. Alternatively, you can modify the dark mode schedule by tapping Options (only shows up with the Automatic switch turned on).
3. Bugs — Update iOS
Apple’s latest iOS 13 update is extremely buggy. That’s why the company seeded the iOS 13.1 update quickly. And it’s understandable considering the various major features included in iOS 13. If dark mode acts wonky, make sure to update your iPhone or iPad regularly. To perform an update, open the Settings app on your iPhone or iPad, and then tap General. Follow that up by tapping Software Update. If there are any new updates available, download and install them. Hopefully, Apple will have the bugs fully ironed out after a few iOS 13 iterations.
4. Bugs — Restart Device
If there are no software updates available, try restarting your iOS device. I can vouch that restarting your phone fixes various anomalies with dark mode in iOS 13. Also, it temporarily addresses other issues such as rapid battery draining. To restart your iOS device, hold down the Power button to bring up the Slide to Power Off Prompt. On the iPhone X and newer models, hold down both the Volume Up and Power buttons instead.
5. Update Apps
Dark mode in iOS 13 is not universal. It mostly applies to native iOS apps, so don’t expect to see everything render in dark mode. Also in Safari, only the user interface will show up in dark mode. However, there are a couple of hacks that you can use to make websites render in dark mode as well. I am not saying that third-party developers on iOS aren’t jumping on the dark mode bandwagon. Apps, such as OneDrive, are now seamlessly integrated into the native dark mode in iOS 13. So if you haven’t updated your apps, do that right away. To update your apps, long-press the App Store icon, and then tap Updates. For more ways to update your apps easily, check out this guide.
6. Activate Dark Mode for Apps Manually
Certain apps don’t feature the native dark mode functionality in iOS 13. That means you must enable dark mode for those apps separately. If you see an app that doesn’t show up in dark mode, dig around to find the dedicated dark mode toggle related to the app. Most often, merely diving into the Settings or Options panel of the app should reveal the option. For example, head into Settings, and then turn on the switch next to Dark Mode to activate dark mode in Outlook for iOS. If you don’t see such an option within an app, then you must wait for the functionality to be added in a future update.
7. Use Smart Invert
If you don’t like the non-universal nature of dark mode in iOS 13, then consider switching to using Smart Invert. This functionality forces everything to render in dark mode by inverting the colors on your screen. Don’t worry — images are mostly left untouched. Just make sure to disable the dark mode beforehand to prevent any conflicts with Smart Invert. To enable Smart Invert, simply head into the Settings app, tap Accessibility, tap Display & Text Size, and then turn on the switch next to Smart Invert. To make it easier to toggle Smart Invert on or off, you can also bind the functionality to the Home or Power buttons. To do that, go to iPhone/iPad Settings > Accessibility > Accessibility Shortcut. Select Smart Invert Colors, and you can turn Smart Invert on or off by triple-clicking the Home or Power buttons.
Turn Off the Lights
The dark mode is a phenomenal addition to iOS 13, and one of the biggest selling points in Apple’s latest mobile update. If you struggled with the dark mode after updating your iPhone, then I hope that the pointers mentioned above helped. Also, I assume that you now have a much clearer idea as to how this functionality actually works. Next up: The Files app in iOS 13 and iPadOS is now better than ever. Check out all of the crazy stuff that you can do with it. The above article may contain affiliate links which help support Guiding Tech. However, it does not affect our editorial integrity. The content remains unbiased and authentic.


