In some cases, hitting the Backspace or Delete key might not work. An example is where your document has a header or footer. The header or footer prevents the cursor of your mouse from moving upwards to remove the page. In such a situation, here are other ways to delete the page on Microsoft Word.
How to Delete a Blank Page at the End of a Microsoft Word Document
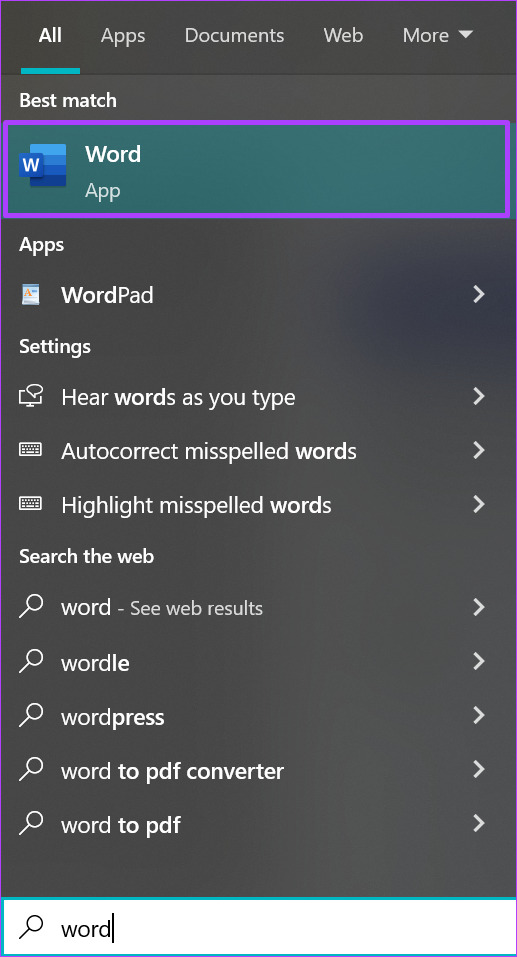
At times, your document will have blank page even after you adjust the font size and formatting. Here are the steps to delete it: Step 1: On your PC, click on the Start menu and search for Microsoft Word.
Step 2: Click on Open to launch the Word app from the results.
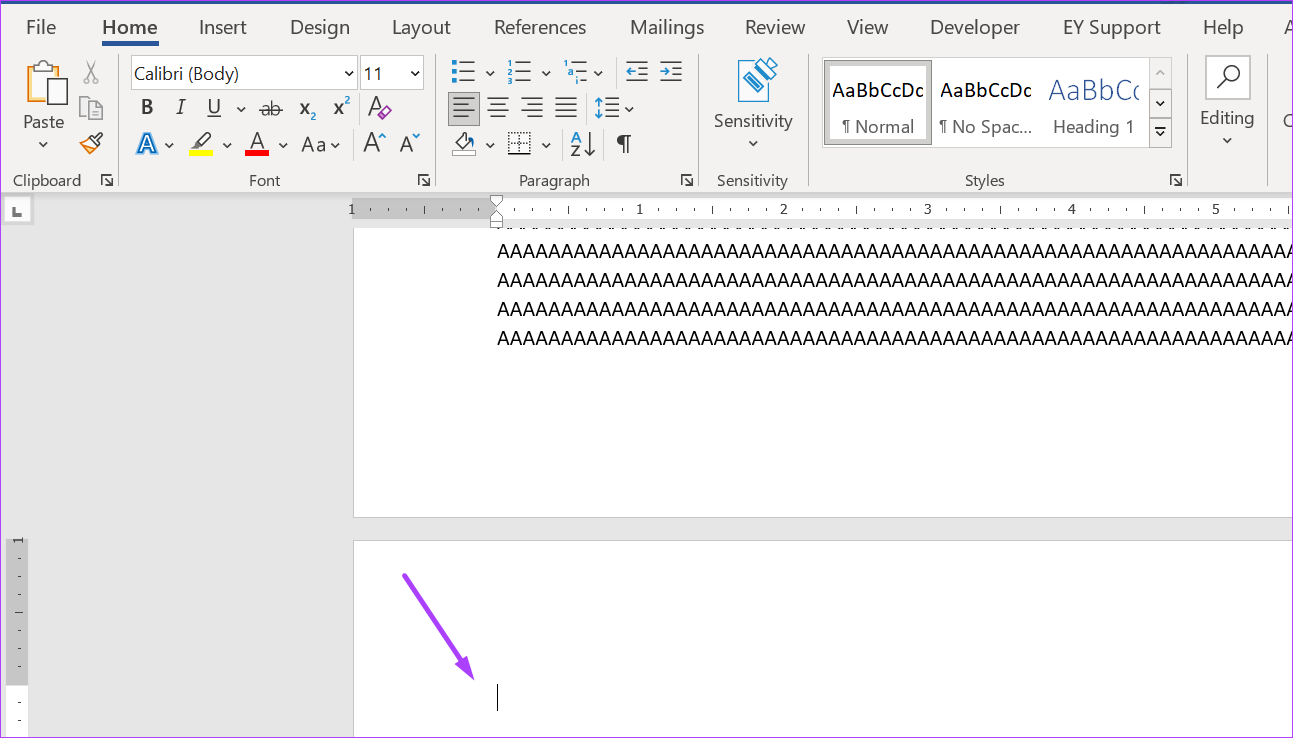
Step 3: Place your cursor on the page for deletion.
Step 4: On your Ribbon, and within the Paragraph group, click on the reversed P sign to show all paragraph marks / page break at the beginning of the blank page. You can also opt to click on Ctrl + Shift + 8 keys simultaneously as a shortcut.
Step 5: Place your cursor in front of the first paragraph sign, left-click on your mouse and drag down till all the paragraph marks are highlighted.
Step 6: Tap the Backspace or Delete key on your keyboard. After that, the blank page on your Word document won’t exist.
How to Delete a Blank Page in the Middle of a Microsoft Word Document
Formatting in a Word document can become tricky if you add a table. While fixing the table width, you might end up adding a blank page in the middle of a document. Here are the steps to delete it: Step 1: On your PC, click on the Start menu and search for Microsoft Word.
Step 2: Click on Open to launch the Word app from the results.
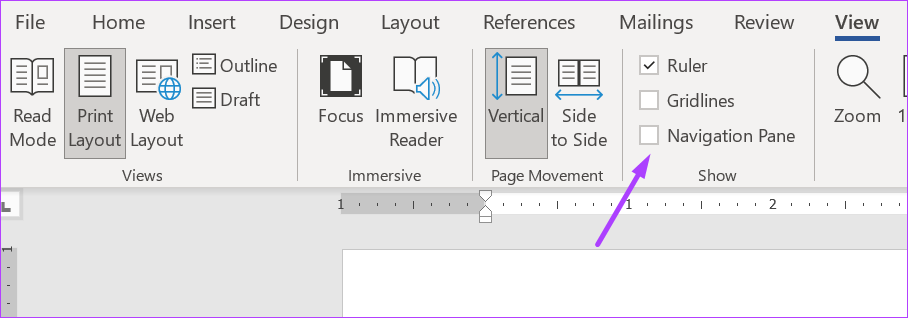
Step 3: On the Ribbon, click on the View tab.
Step 4: In the Show group, tick the box beside Navigation Pane. You can use the shortcut Ctrl + F to launch the Navigation Pane.
Step 5: On the Navigation Pane, click on Pages to view all pages on the document.
Step 6: The Navigation Pane typically highlights the active page on Word. Click the blank middle page if not already highlighted.
Step 7: Tap the Delete key on your keyboard, and the page should no longer exist.
How to Delete a Filled Page in Any Part of a Microsoft Word Document
Hitting the backspace key to delete the entire content of a Word page can get tiring. At the same time, it does not guarantee that after all content is deleted, the newly blank page will also be deleted. Instead, here’s what you can do to delete a filled page on your Word file. Step 1: On your PC, click on the Start menu and search for Microsoft Word.
Step 2: Click on Open to launch the Word app from the results.
Step 3: Place your cursor on the page for deletion.
Step 4: On your Home Ribbon, click on the Editing icon.
Step 5: Click on Find from the drop-down.
Step 6: Click on Advanced Find from the drop-down. You can also click Ctrl + G on your keyboard to launch the Find and Replace dialog box.
Step 7: On the Find and Replace dialog box, on the Go To tab.
Step 8: On the Go to what menu, click on Page.
Step 9: In the field under Enter page number, type \page.
Step 10: At the bottom of the Find and Replace dialog box, click on the Go To button. Clicking the Go To button will highlight all the content on the page for deletion.
Step 11: Click the Close button at the bottom of the dialog box.
Step 12: Tap the Backspace or Delete key on your keyboard.
Changing the Page Orientation on Microsoft Word
When you change the page orientation of your Microsoft Word file from portrait to landscape or vice versa, sometimes an additional blank page gets created. To delete the new blank page, follow any of the steps above. The above article may contain affiliate links which help support Guiding Tech. However, it does not affect our editorial integrity. The content remains unbiased and authentic.

